BEST SPOTIFY EQ SETTINGS FOR AIRPODS/AIRPODS PRO
Regarding Spotify listening, everyone has his preferences for genres and audio output. Some are heavy bass enthusiasts, while others are acoustic aficionados. Spotify offers a powerful tool known as the equalizer, allowing you to customize your audio output, ensuring your music resonates exactly the way you desire. Adjusting your Spotify equalizer settings for AirPods may be the key to perfection and immersive listening experiences.
The audio equalizer adjusts the balance of different audio frequencies to enhance or customize the sound output. Within an audio signal, the volume of specific frequency bands is modified. The frequency spectrum of audio is typically categorized into three main ranges: bass, midrange, and treble.
What is the Best Equalizer setting for Spotify on Airpods?
Instant Answer:
Open the Equalizer in Spotify: Open the Spotify app, select Settings from the menu, then choose Playback, then Equalizer. Toggle the Equalizer option on to enable it, then modify the various frequency sliders by moving them up and down to reach the settings according to music genre and preferences.
To truly optimize the audio output, I have discovered that fine-tuning the Spotify EQ settings can make a significant difference. In this article, I’ll be sharing my personal recommendations for the best Spotify EQ settings specifically designed for AirPods users. These settings will help you enhance your audio experience from beginning to end.
How do I Access the Spotify Equalizer Settings
You can utilize Spotify’s built-in equalizer directly from the app while using AirPods with the service. To achieve this follow the following steps,
- Access the Spotify app on your device.
- Navigate to the ‘Settings’ section.
- Look for the ‘Playback’ option and select it.
- Within the ‘Playback’ settings, locate and tap on the ‘Equalizer’ feature.
- You’ll notice that the Equalizer graph line appears flat. When using the default flat equalizer setting, the audio output remains unaltered.
- To enhance your audio experience, enable the Equalizer feature. Once enabled, drag down and adjust the settings to suit your preferred music genre.
In the Equalizer chart, the left side typically represents the bass frequencies. Increasing this setting will significantly boost the bass while decreasing the bass and enhancing the treble frequencies.
How do I Use the Spotify Equalizer
According to my recommendation, the Late Night EQ setting is worth considering as it can deliver the desired sound on AirPods. However, it’s worth noting that the best settings may differ based on the specific music genre and personal preferences of each individual.
Spotify equalizer exhibits a resemblance to that of standard EQ. The distinction lies in the inability to modify the EQ size or manipulate the frequencies. As a customized equalizer, the available frequencies for boosting or cutting are fixed at 60Hz, 150Hz, 400Hz, 1kHz, 2.4kHz, and 15kHz.
Desired amplitudes can be adjusted by dragging the nodes up and down vertically to adjust the frequency levels.
Optimized EQ Settings for AirPods on the Spotify App
There is no universal formula for discovering ideal Spotify equalizer settings due to the number of given variables in tailoring a perfect sound. The art of equalization depends on the genre of music and the listener’s choice. You have to find the best equalizer on the Spotify app on the iPhone.
If you like bass-heavy beats like EDM or hip-hop, the Bass Booster preset is the perfect option. The Acoustic preset is the right fit for those who prefer a more authentic and unaltered sound. And pop preset could be a perfect match for people loving crystal clear vocals in pop tunes.
Spotify Equalizer Customization for Air Pods and Air Pods Pro
Equalizer customization is really simple. The equalizer interface consists of approximately 5 to 6 frequency bars, arranged horizontally from the left (representing the bass frequencies) to the right (representing the treble frequencies).
- The sub-bass range typically spans from 20 to 60 Hz. It is recommended to utilize a subwoofer or a pair of open-back headphones to perceive the sound within this frequency range,
- The bass range typically falls within the 60 to 200 Hz spectrum. If you are using AirPods and desire a pronounced and impactful bass response, this is the frequency range you should primarily focus on.
- The low mids encompass from 200 to 600 Hz, providing a warm and rich sound, while the mid-range spans around 600 Hz to 3 kilohertz, offering clarity and presence to the audio.
- The upper mids extend up to 8 kilohertz, contributing to the overall definition and detail of the sound.
- The high-frequency range, also called treble, dominates the volume spectrum, often reaching up to 20 KHz in most speakers.
Some Recommendations for Different Genres:
Following are some personal recommendations for the best Spotify EQ settings specifically tailored for AirPods users, ensuring an enhanced audio journey from start to finish.
Follow the below-mentioned guidelines for frequency adjustments.
Follow the below-mentioned guidelines for frequency adjustments.
- To enhance the low frequencies, raise the sliders on the far left (60 Hz and 150 Hz).
- To create a dip in the midrange frequencies, make slight adjustments by decreasing the sliders in the middle (400 Hz, 1 kHz, and 2.4 kHz).
- To amplify the high frequencies, adjust the sliders on the far right (5.6 kHz and 15 kHz) by raising them upward.
Spotify Equalizer Presets for Airpods & Airpods Pro
In addition to considering the genre of music, there are other preset options available to choose from. Presets offer a quick and convenient way to adjust the sound profile based on your personal preferences. we will delve into some of the best Spotify equalizer presets specifically designed for AirPods and AirPods Pro, allowing you to elevate your music experience to new heights.
Bass Booster
A base booster is used to increase the frequency and bass levels. While listening to electronic music featuring kick drum or bassline, this preset enhanced the low-end frequencies, ultimately giving an immersive experience to connect with powerful low-frequency elements. There might be a better preset, as here you can feel sound little muddy. In that case, you can enhance some higher frequencies.
It is noteworthy that air pods and air pods pro have limited bass response. So, try avoiding overcompensation while adjusting the equalizer settings.
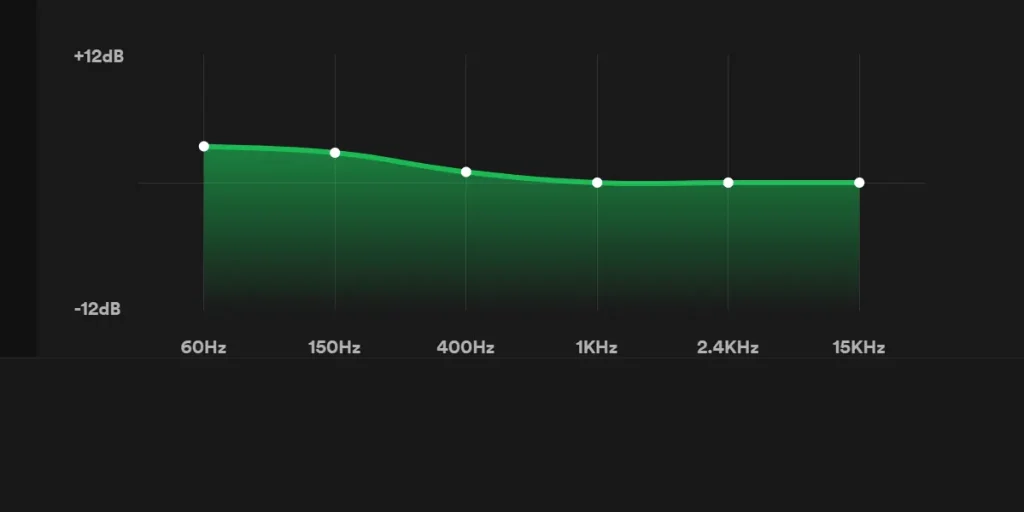
Loudness
This particular preset is implied to increase the dynamic range and loudness of the audio when listening at high volumes. To achieve this, I imparted the lower end and implied the mid-range, as this area is highly sensitive to the human ear. Perception of increased loudness can be achieved by introducing more mid-range frequencies.
Guitar-based music can remarkably accentuate the instrument’s punchiness. However, it is important to exercise caution as excessive mid-range boost can sound unnatural. It was a more powerful preset for Rock tracks.
Spoken Words
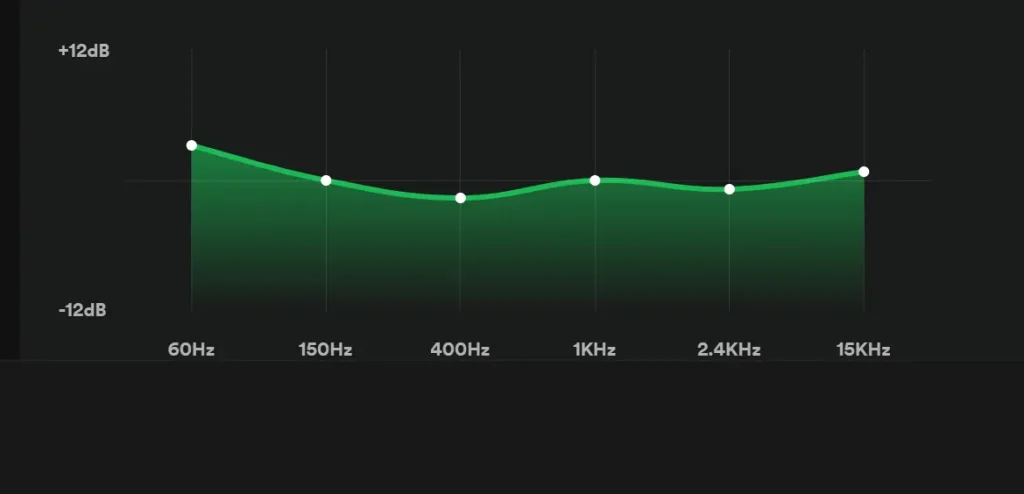
I found it best for podcasts, as this brightens the speech and makes words more audible. This preset was created specifically to enhance the clarity and understanding of human voices. It emphasizes human voice intelligibility because of the substantial surge in 1- and 2.4 kHz.
The high-frequency spectrum is attenuated to avoid excessive and unpleasant harshness.
Try a slightly lower mid-range boost if you find the sound more unnatural. However, if the speaker’s voice is overshadowed by music in the recording, reducing the lower frequencies further will help clarify the speech.
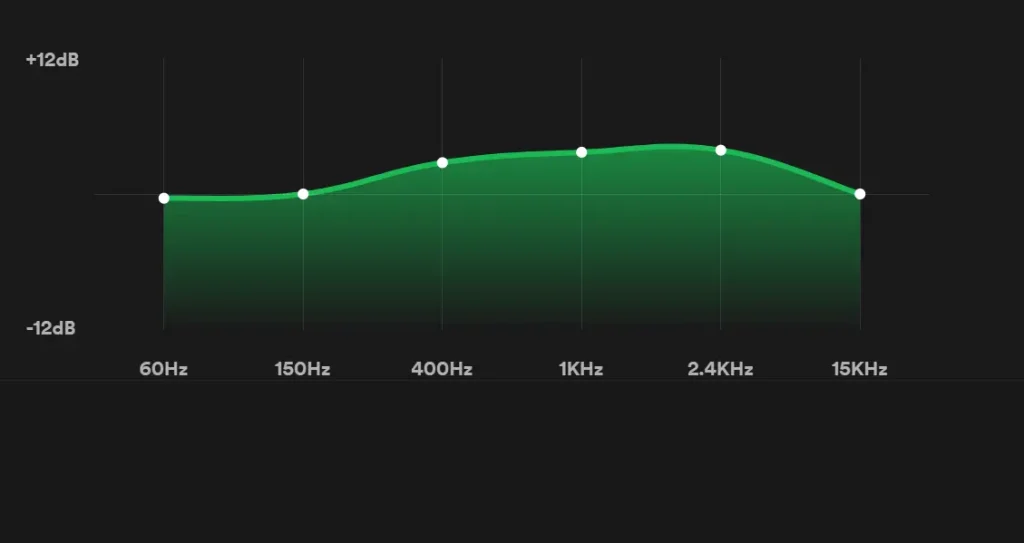
Classic EQ
The male vocals are slightly muted in comparison to the instruments when using the classical preset EQ. Use this preset depending on your preferences.
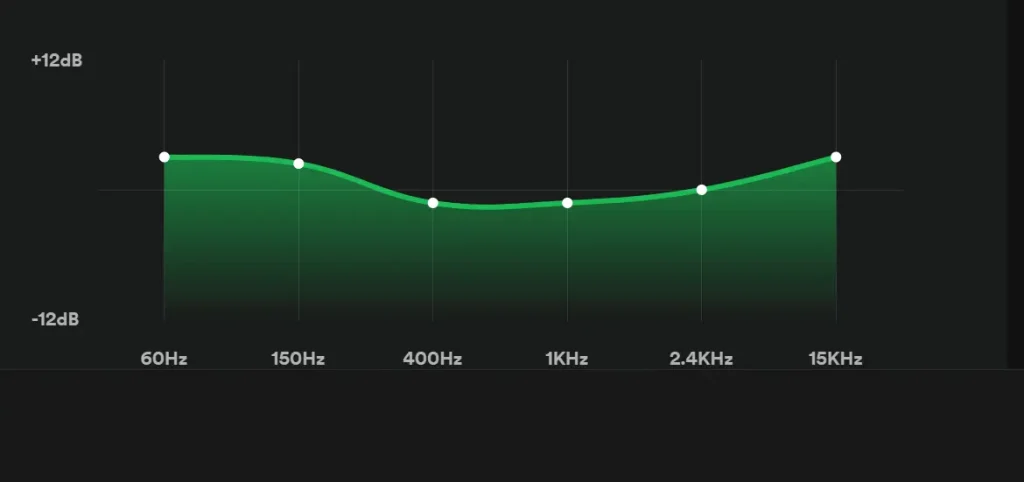
Dance EQ
This setting emphasizes female voices and string instruments making them more prominent by enhancing treble frequencies.
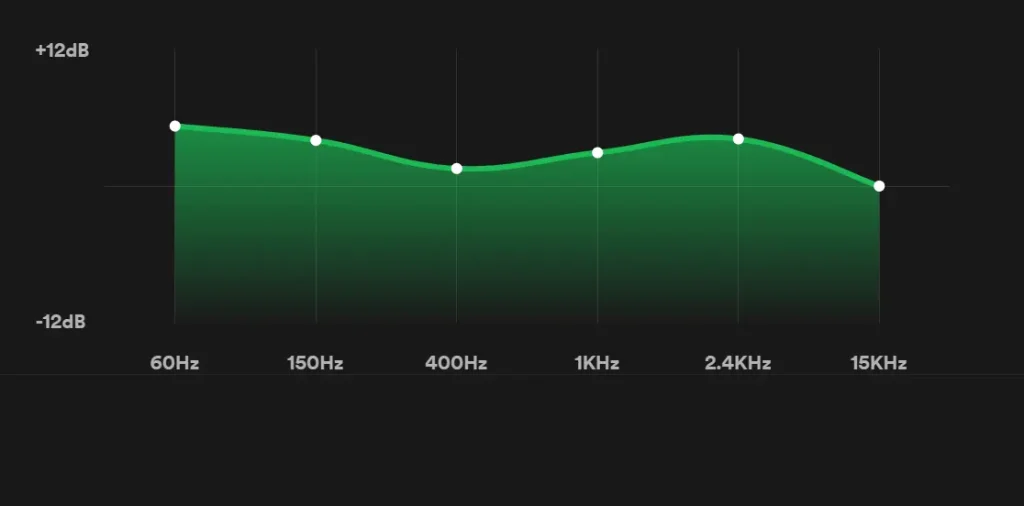
Hip Hop EQ
I used it for a hip-hop playlist, It worked well, but it is only recommended for some specific types of songs. You may easily enable or disable this feature with just one click.
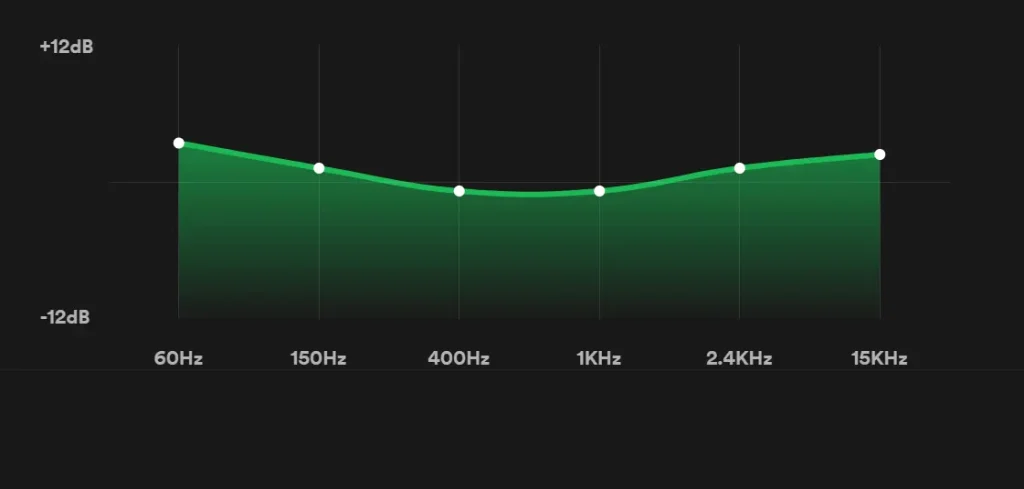
Pop EQ
This preset enhances the bass while muting the treble. There are no visible EQ adjustments. However, certain frequency changes can be observed at 400 Hz, 1 kHz, and 2.4 kHz.
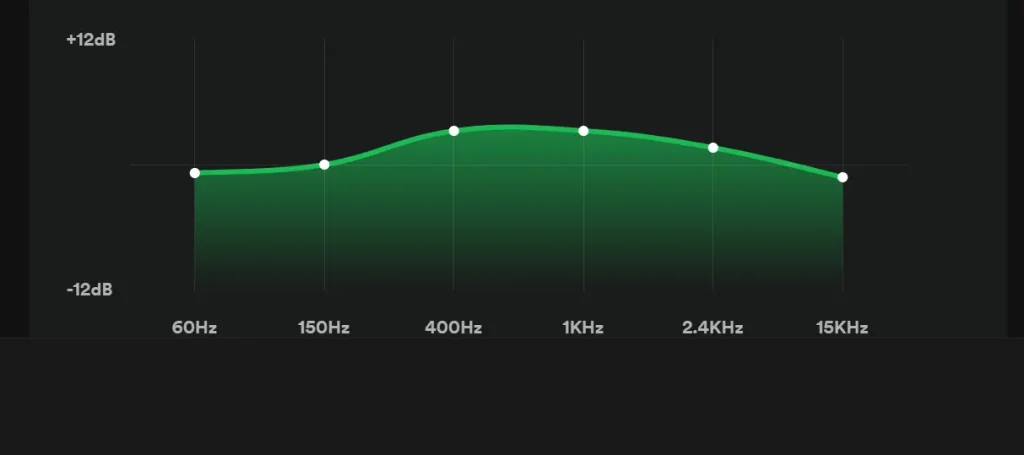
Jazz EQ
This setting elevates the bass, reduces the mid-range frequencies, and enhances the treble. You can use this if it suits your preferences.
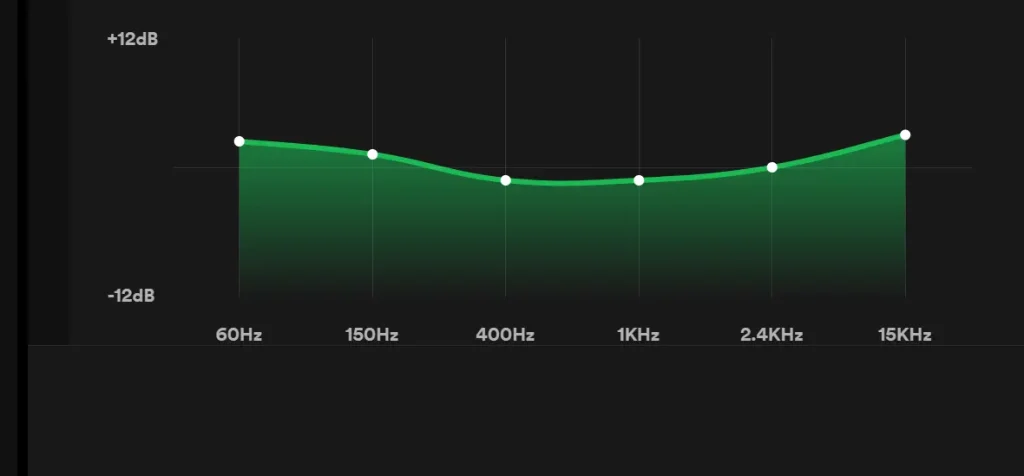
Rock EQ
It increases both bass and treble frequencies. I suggest this for heavy songs. But if it doesn’t match your taste, you can switch to the default settings.
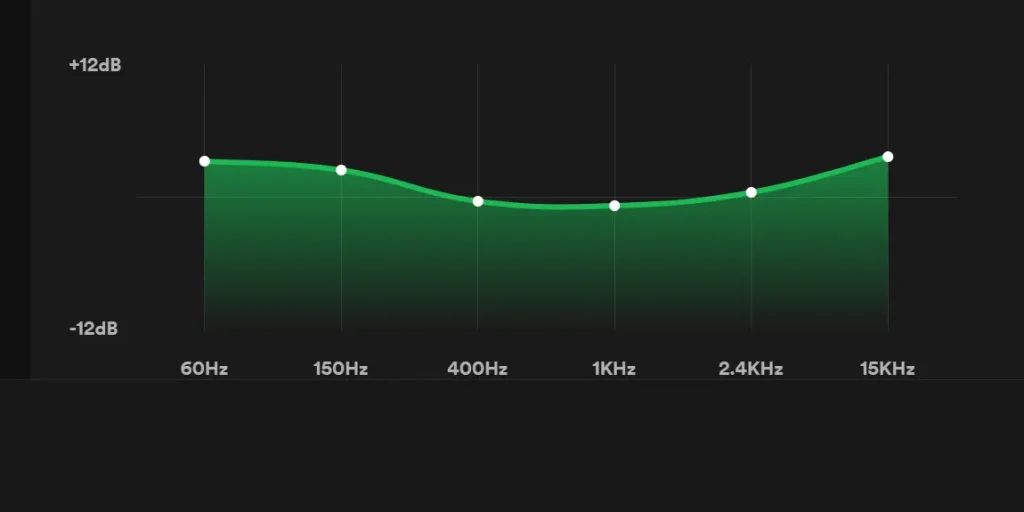
Acoustic EQ
You can experience fun with this preset as; generally, it is not liked by many listeners. If you switch to the acoustic setting, you can easily reset the equalizer by clicking the Reset option.
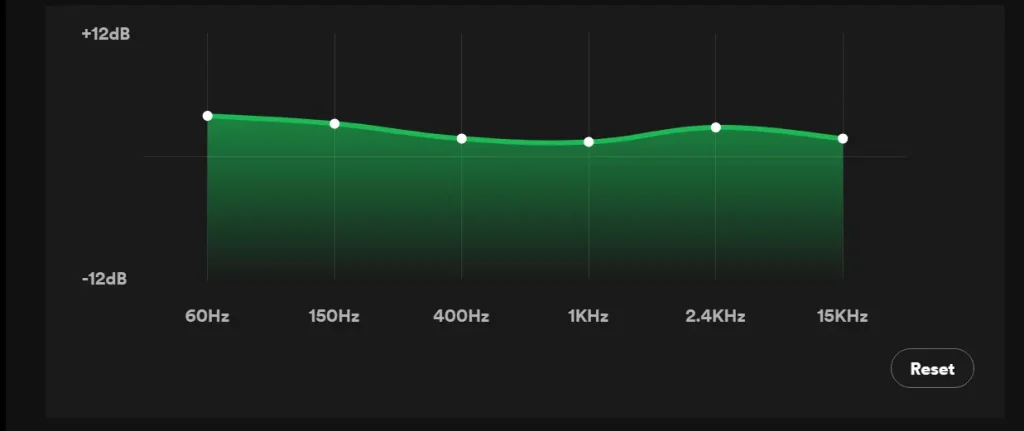
Experimentation with Equalizer
Those mentioned above are 10 of the 22 equalizer presets I have discussed. You can experiment with the equalizer settings. If you feel something is missing, you can identify the frequency range and can play yourself with that. For example, you can fine-tune the low-end frequencies if you feel kick and bass elements are missing. If you want to enhance the sound of instruments, focus on Mid-range. Boosting the top end will provide vocal clarity.
You can also consider subtractive EQ techniques, which selectively remove specific frequencies to create more sonic space in the mix.
In cases where your track appears muddy, the lows and low mids likely need to be set. On the other hand, if any audio piece sounds thin or harsh, reducing the top end will help facilitate the sound quality.
FAQs:
Conclusion
In conclusion, finding the best equalizer settings for AirPods and AirPods Pro can greatly enhance your audio experience. By adjusting the EQ settings to your unique preferences and the specific genre of music you are enjoying, you can create a captivating and immersive audio experience that is both balanced and personalized. Whether you prefer to boost the bass, fine-tune the midrange, or enhance the treble, experimenting with different EQ presets and manual adjustments, you can customize the sound output to your tastes. Remember to consider the limitations of the AirPods’ size when adjusting the bass response and avoid overcompensating.
